How to: collect and save seeds in the garden


In the rhythm of the gardening calendar, seed saving stands as both an end and a beginning. As our growing season begins to wind down, harvesting seeds connects this season to the next, preserving our favourite and strongest blooms for years to come. Not only does saving your seeds hold an economical benefit, it is also an easy and rewarding practice, connecting you to the cycle of your garden and the plants you grow.
Throughout the growing season, pay attention to which plants have been the most floriferous, what has grown particularly well? Did you have a favourite scented sweet pea? If leaving some annuals to self-seed where they are currently, would you like to grow an annual somewhere else in the garden, or gift to friends and family? Simply tie a little label, ribbon or string on plants whilst in flower, this will help enormously once a sea of seed pods greets you in late August and September.
Inspiration
The first step in successful seed saving is to recognise when your seeds are ripe and ready to be harvested, to stand you in good stead for planting.
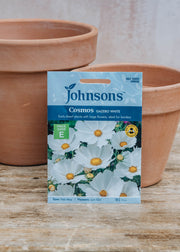
- Flowers: For flowers such as marigolds, zinnias, and cosmos, wait until the flowers have faded and petals fall away, revealing dried brown seed heads on the plant. To check readiness, see if your seed head is easily crumbled between your fingers. If not, it will need a little longer to mature.
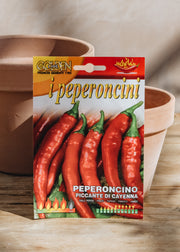
- Vegetables: Depending on your variety of vegetable, take a tailored approach. Chillies, Tomatoes, Aubergines and Courgettes should be left on the vine until they’re fully ripe, even a bit overripe, before cutting into the flesh to extract the seeds. Beans and peas need to dry out on the plant until the pods are brown and crispy. For leafy greens like lettuce or herbs like basil, let the plant bolt (flower and produce seeds), and wait until the flower stalks dry out.
- Fruits: With cucumbers, squashes, and melons, leave the fruits on the plant well beyond the stage when you would normally harvest them for eating. The seeds inside will continue to mature as the fruit overripens. When the fruit is very soft and starting to decline, this is often an indicator that the seeds inside are ready.


Once your seeds are ‘ready’, the next step is careful harvesting, avoiding damage and allowing them to disperse all over the garden! Be mindful of how many seeds you collect, although they should store well for a few years, sharing your crop with visiting birds throughout the winter is a real delight, encouraging diversity of wildlife, and aiding natural pest-control when the odd ‘side’ of mollusk is served alongside.
- Flowers: For flowers, cut the dried seed heads and place them in a paper bag, cheese cloth or netted bag, depending on the size of the seed. Shake the bag gently to release the seeds or simply break apart the seed heads with your fingers and catch in a jar, envelope or piece of paper (white is useful for those straining to see tiny seeds!)
- Vegetables: For vegetables like beans and peas, simply split open the dried pods and collect the seeds inside. Tomatoes require a bit more work—scoop out the seeds along with the surrounding gel, place them in a jar with some water, and let them ferment for a few days. This process helps remove the gel and any potential diseases. After fermentation, rinse the seeds and spread them out to dry on a paper towel, ready to pick off and collect once dry.
- Fruits: With cucumbers, squash, and melons, cut open the overripe fruit and scoop out the seeds. Wash them thoroughly to remove any pulp, then lay them out on a screen or paper towel to dry.
Start your cycle with our seed collections
Thorough drying and stable storage is key to prevent mould and ensure viability. After harvesting, spread your seeds out in a single layer on a dry surface. Paper, kitchen roll, baking parchment, a spare coffee filter or old wrapping paper works well. Keep seeds in a warm, shaded place, away from direct sunlight. If you are drying flower seeds, tie in a bunch and hang upside down. You may also want to keep a bag surrounding them at this stage, as some stray seeds may make a break for freedom. Depending on the seed type, drying can take anywhere from a few days to a couple of weeks.
Once dry, it’s time to store your seeds. The key to successful seed storage is to keep them cool, dry, and dark. Store your seeds in envelopes, small paper bags, glass jars or tins and don’t forget to label them with the plant variety and the date of harvest. To help keep seeds dry, you can add a small packet of silica gel or grains of rice to the container. Place your containers in a cool, dark place or the fridge if you have space.
